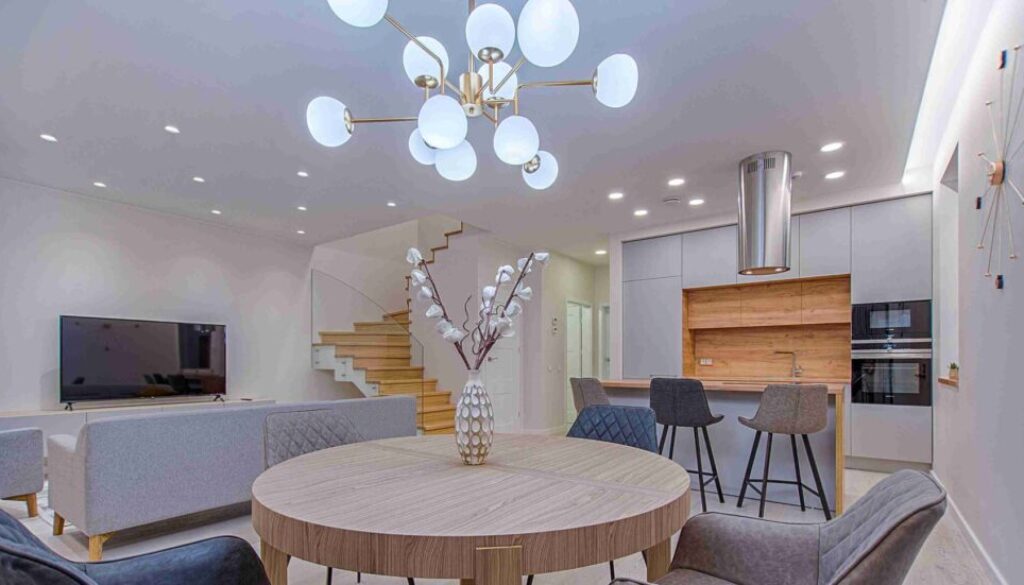
5 Genius DIY Lighting Solutions to Illuminate Your Home
Explore the world of creativity and style with DIY Lighting Solutions. Transform your space into a personalized haven with 5 genius projects.
DIY Lighting Solutions
Ever wondered how to sculpt light to match your unique style without breaking the bank? Brace yourselves as we delve into the captivating world of DIY lighting solutions. Imagine turning ordinary objects into luminary masterpieces, and corners of your home into personalized havens.
Join us in this luminous adventure where creativity meets functionality, and discover how a touch of DIY magic can transform your living spaces into captivating realms of light and imagination.
Light up your environment and spark your imagination – join us on a quest to illuminate your world, project by project.
DIY Accurate Mood Lighting
DIY Accurate Mood Lighting, is a technique within the realm of DIY lighting solutions that empowers you to control the ambiance of your space with precision. Whether you’re aiming for a cozy glow or a vibrant atmosphere, this method allows you to tailor the lighting to match your desired mood effortlessly.

Steps:
- Assess Your Space: Begin by evaluating the lighting needs of the room. Consider factors such as the size of the space, natural light sources, and the intended use of the area.
- Choose the Right Bulbs: Select bulbs with adjustable brightness and color temperature to accommodate different moods and activities. LED bulbs with dimming capabilities are ideal for creating versatile lighting options.
- Install Dimmer Switches: Upgrade your existing light switches with dimmer switches to gain precise control over the brightness levels. Dimmer switches allow you to adjust the intensity of the light to match the desired ambiance.
- Experiment with Color: Explore the effects of different lighting colors on mood and atmosphere. Warm tones promote relaxation and intimacy, while cool tones energize and stimulate productivity.
- Layer Lighting: Incorporate multiple light sources, such as overhead fixtures, lamps, and accent lights, to create depth and dimension in your space. Layering lighting adds visual interest and enhances the overall ambiance.
- Automate with Smart Lighting: Consider integrating smart lighting systems that offer programmable settings and remote control options. Smart bulbs and switches enable you to schedule lighting changes throughout the day and customize presets for various activities and moods.
With these steps, you can master DIY Accurate Mood Lighting and transform your space into a haven of comfort and ambiance tailored to your preferences. Experiment with different techniques to find the perfect lighting solution for every occasion.
Expressions
Expressions is a captivating DIY lighting solution that allows you to infuse your space with personality and charm through custom light fixture designs. Expressions empower you to unleash your creativity and craft lighting fixtures that reflect your unique style and taste.

Steps:
- Inspiration and Design: Begin by gathering inspiration from various sources such as magazines, online platforms, or nature itself. Sketch out your design ideas, taking into account the aesthetic and functional requirements of the space.
- Select Materials: Choose materials that align with your design vision and budget. Consider options such as wood, metal, glass, or even unconventional materials like recycled materials or found objects.
- Measure and Prepare: Take precise measurements of the space where the light fixture will be installed. Prepare the materials accordingly, cutting or shaping them to fit the design specifications.
- Assembly and Construction: Assemble the components of the light fixture according to your design plan. Use appropriate tools and techniques to ensure sturdy construction and proper alignment.
- Wiring and Installation: If your DIY light fixture requires electrical wiring, follow safety guidelines and consult a professional if needed. Install the fixture securely, ensuring proper alignment and stability.
- Finishing Touches: Put the finishing touches on your DIY light fixture by sanding, painting, staining, or applying any desired finishes. Add decorative elements or embellishments to enhance the visual appeal and cohesiveness of the design.
With Expressions DIY light fixture design, you have the freedom to create stunning focal points that illuminate your space and showcase your individuality.
Little Wood Block Lights
A charming DIY lighting solution that adds warmth and character to any space. With this creative project, you can transform humble wooden blocks into delightful ambient lights that radiate coziness and style.

Steps:
- Gather Materials: Start by gathering the necessary materials, including wooden blocks of your desired size, LED tea lights, sandpaper, and wood glue.
- Prepare the Blocks: Sand the wooden blocks to smooth out any rough edges and create a clean surface for painting or staining. Consider adding decorative touches such as engraving or painting designs onto the blocks.
- Drill Holes: Using a drill with a paddle bit or spade bit, carefully drill a hole in the center of each wooden block large enough to accommodate the LED tea light.
- Insert LED Tea Lights: Place an LED tea light into each drilled hole, ensuring a snug fit. You may need to apply a small amount of wood glue around the edges of the tea light to secure it in place.
- Finishing Touches: Optionally, apply a coat of paint or stain to the wooden blocks to enhance their appearance and complement your decor style. Consider adding decorative elements such as ribbons, twine, or faux foliage for a personalized touch.
- Arrange and Display: Once the glue is dry and any additional embellishments are added, arrange your Little Wood Block Lights in desired locations throughout your home. These charming ambient lights can be displayed individually or grouped to create a captivating focal point.
With Little Wood Block Lights, you can infuse your space with the warm glow of handmade craftsmanship. Whether placed on a mantel, shelf, or tabletop, these DIY ambient lights add a touch of rustic elegance and whimsy to any room.
Eco Sawdust Shades
A sustainable DIY lighting solution that combines eco-conscious materials with chic design aesthetics. With this innovative project, you can create stylish lampshades using environmentally friendly sawdust composite materials, reducing waste and adding a touch of natural elegance to your space.

Steps:
- Prepare Sawdust Composite: Start by mixing sawdust with a non-toxic adhesive or resin binder to create a workable composite material. Adjust the ratio of sawdust to binder to achieve the desired consistency and texture.
- Create Mold: Construct a mold for your lampshade using a sturdy material such as cardboard, plastic, or wood. Shape the mold according to your desired lampshade design, ensuring it is the appropriate size for your light fixture.
- Apply Composite Material: Press the sawdust composite mixture into the mold, ensuring an even distribution and smooth surface. Use a spatula or your hands to compact the material and remove any air bubbles.
- Cure and Harden: Allow the composite material to cure and harden according to the manufacturer’s instructions. This may involve air drying, curing in an oven, or using a curing agent or catalyst.
- Remove from Mold: Once the composite material has fully cured, carefully remove the lampshade from the mold. Use a utility knife or sandpaper to smooth any rough edges or imperfections.
- Install and Enjoy: Install your Eco Sawdust Shade onto your light fixture, whether it’s a pendant, table lamp, or floor lamp. Turn on the light to bask in the warm, natural glow emitted through the eco-friendly lampshade.
With Eco Sawdust Shades, you can illuminate your space with style and sustainability. These handmade lampshades not only add a unique touch to your decor but also serve as a testament to your commitment to eco-conscious living.
DIY Hue-Switch Lighting
A dynamic DIY lighting solution that puts customization and control directly into your hands. With this innovative project, you can create lighting fixtures that allow you to switch between different hues and colors effortlessly, adapting to any mood or occasion with ease.

Steps:
- Select Lighting Components: Start by choosing LED light strips or bulbs that are compatible with color-changing capabilities. Opt for smart bulbs or RGB LED strips that can be controlled remotely via smartphone apps or wireless controllers.
- Design Fixture Housing: Design or repurpose a housing for your lighting fixture that accommodates the selected LED components. Consider using materials such as wood, acrylic, or metal to create a sleek and functional housing.
- Install LED Components: Mount the LED light strips or bulbs inside the fixture housing according to the manufacturer’s instructions. Ensure proper wiring and connections are made to enable color-changing functionality.
- Connect Control Module: If using smart bulbs or LED strips, connect the control module or hub to your home Wi-Fi network. Follow the setup instructions provided by the manufacturer to pair the LED components with the control system.
- Program Lighting Scenes: Use the accompanying smartphone app or remote control to program different lighting scenes and color presets. Experiment with combinations of colors, brightness levels, and transition effects to create a custom ambiance for various activities and moods.
- Mount and Enjoy: Once your DIY Hue-Switch Lighting fixture is assembled and programmed, mount it in your desired location and enjoy the flexibility of customizable illumination at your fingertips. Use the app or remote control to switch between lighting scenes effortlessly, transforming your space with the tap of a button.
With DIY Hue-Switch Lighting, you have the power to tailor the ambiance of your space to suit any occasion or preference. Whether you prefer calming pastels for relaxation or vibrant hues for entertaining, this dynamic DIY lighting solution puts you in control of your environment.
Overview
In the realm of DIY lighting, endless opportunities await to infuse your space with creativity and functionality. Crafting custom fixtures and incorporating smart systems showcase the vast potential for those exploring their DIY skills. Experimenting with eco-friendly materials, or paying homage to favorites, each DIY project adds a unique touch. Roll up your sleeves, unleash your imagination, and let there be light – DIY style.
Ready to brighten up your home with DIY lighting solutions?
Start your next project today and illuminate your space with creativity and style.


