
6 Best Room Divider Ideas in the USA in 2023
Looking for room divider ideas in the USA? Check out our list of 6 creative and stylish room dividers that can help you create separate spaces in your home, without building a wall.
Introduction
Room dividers are a great way to add privacy, functionality, and style to your home. They can be used to create separate spaces in a studio apartment, divide a large room into two smaller ones, or simply add a touch of personality to your decor. If you’re looking for room divider ideas in the USA, you’re in luck. There are many types of room dividers available, from simple curtains to elaborate screens. And with so many styles to choose from, you’re sure to find the perfect room divider for your home.
Some popular options are:
- Curtains: Curtains are a simple yet affordable way to divide a room. They can be drawn open or closed to create different levels of privacy. Choose curtains that complement the decor of your room.
- Folding screens: Folding screens are another versatile room divider option. They can be folded up and stored away when not in use, making them a good choice for small spaces. Folding screens come in a variety of materials and styles, so you can find one that matches your decor perfectly.
- Partition room dividers: Partition room dividers are more permanent than curtains or folding screens. They are typically made of wood, glass, or metal, and they can be installed on the floor or ceiling. Partition room dividers are a good option if you need to create a more private space, such as a home office or guest room.
- Freestanding shelves: Freestanding shelves can be used to divide a room while also providing extra storage space. Select a shelf unit that is the right height and width for your space, and be sure to secure it to the wall if necessary.
DIY Room Divider Ideas
If you’re looking to save money, there are plenty of easy do-it-yourself room divider options to explore. A couple of DIY room divider ideas to consider:
Bookcase
Looking for an elegant and efficient way to divide a room? Consider using a bookcase. Bookcases are a great way to add storage and privacy to any space, and they can be used to create a variety of different looks.
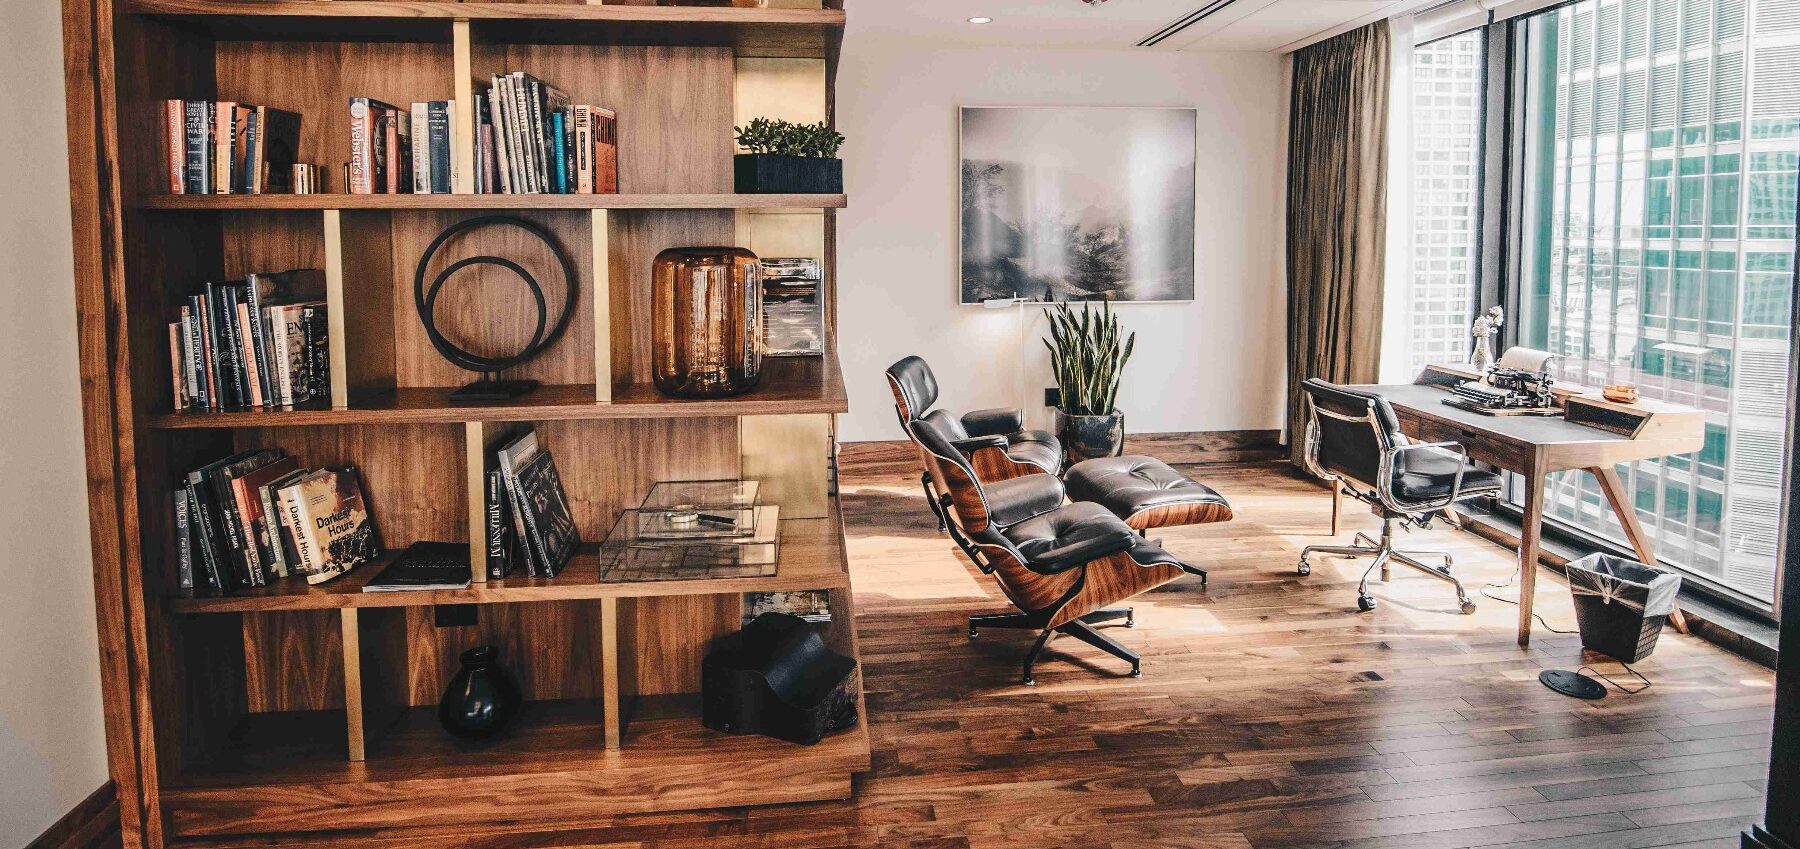
To create a simple DIY room divider, follow these easy steps:
- Choose a bookcase that is the right height and width for the space.
- Consider placing the bookcase on a rug or carpet to help define the different areas of the room.
- Use the bookcase to display books, photos, plants, and other decorative items.
- If you’re using a tall bookcase, be sure to anchor it to the wall to prevent it from tipping over.
Types of bookcases
- Double-sided bookcase: This is a great option for dividing a large room into two smaller spaces. Simply place a bookcase in the center of the room with the shelves facing both directions.
- Back-to-back bookcases: This is a good option for creating a more private separation between two spaces. Place two bookcases back-to-back, with the backs facing each other.
- Bookcase headboard: This is a unique and stylish way to divide a bedroom into two spaces. Place a bookcase against the wall behind your bed and use it as a headboard.
Benefits
No matter how you decide to use it, a bookcase is a great way to add style as well as function to your home. With a little creativity, you can use a bookcase to create a room divider that is both unique and practical. You can use it to create a:
- Home office in your living room. Simply place the bookcase between the two spaces and add a desk and chair to the home office side.
- Reading nook in your bedroom. Place the bookcase between your bed and the rest of the room, and add a comfortable chair and ottoman.
- Play area for your children in your living room or family room. Place the bookcase between the play area and the rest of the room, and add toys, books, and games to the play area side.
- Mudroom in your entryway. Place the bookcase between the entryway and the rest of your home, and add hooks for coats and hats, shelves for shoes, and baskets for other items.
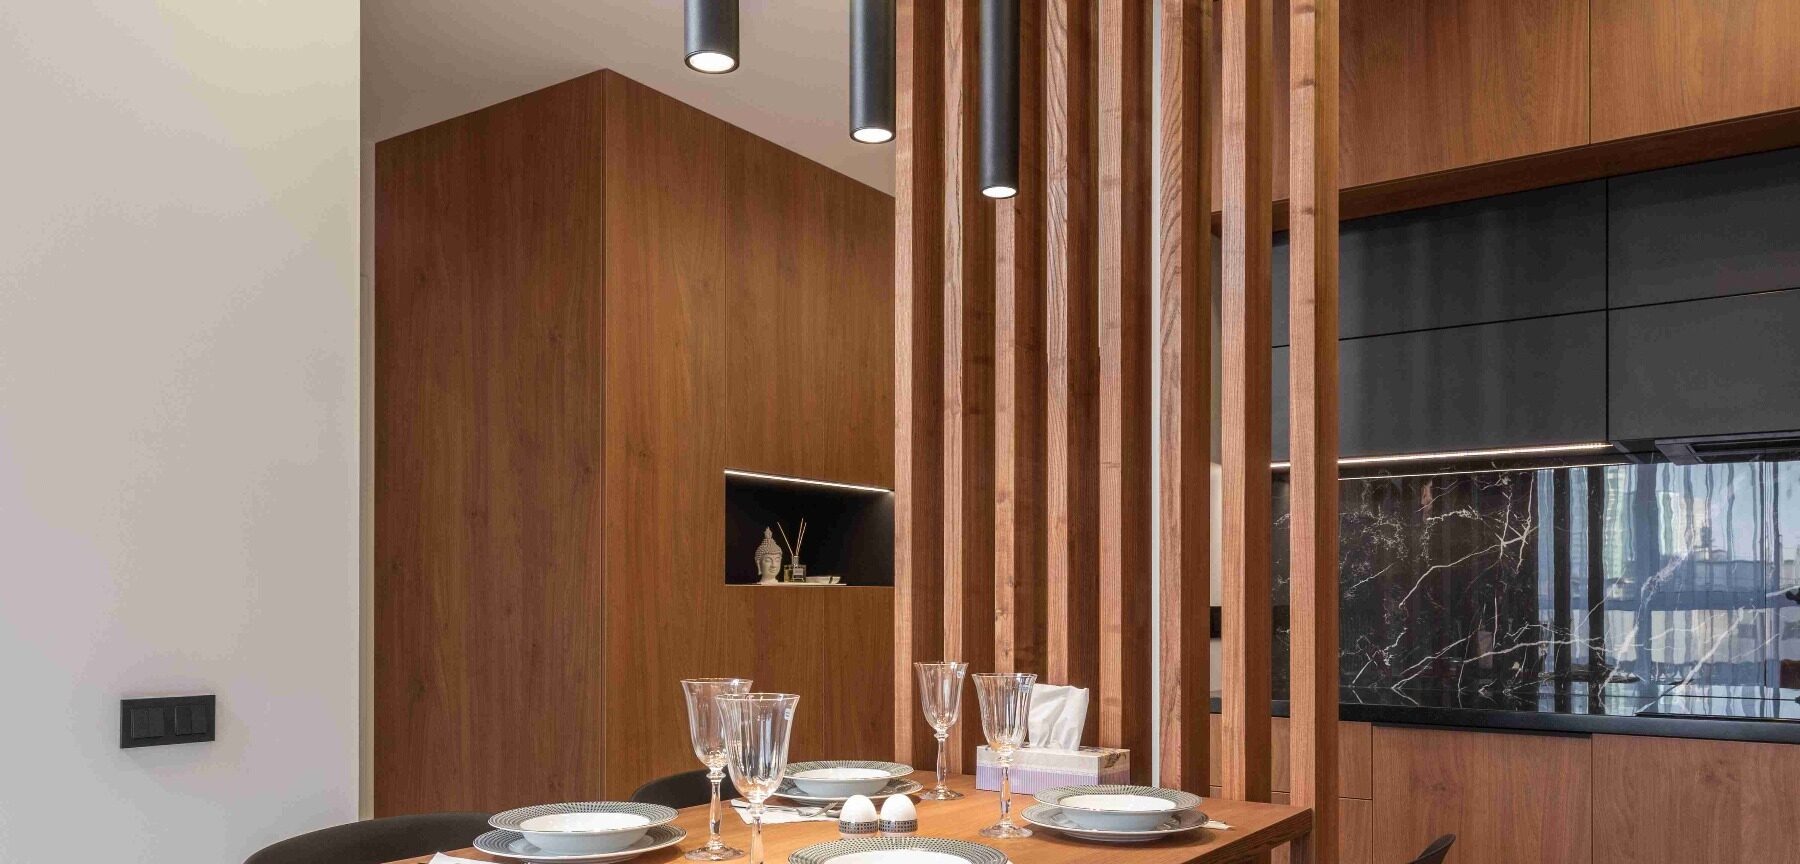
DIY Slat Wall Room Divider
A slat wall is a versatile and stylish room divider that can be made with a few simple supplies and tools. It is a great way to create separate spaces in a room without blocking out light or making the room feel smaller.
To build a slat wall room divider, you will need:
- Wood slats (1×4 or 2×4)
- 2×2 lumber
- Screws
- Drill
- Saw
- Measuring tape
- Level
Instructions:
- Cut the wood slats to the desired length of your room divider.
- Screw the 2×2 lumber to the back of the wood slats, creating a frame.
- Attach the framed slats to the wall or floor using screws.
- Enjoy your new room divider!
Any type of wood can be used for your slat wall, but be sure to choose a wood that is durable and easy to work with. You can customize your slat wall to match your decor by painting or staining the wood.
Benefits
- Storage: Slat walls are a great way to add storage to a room. For example, you can hang baskets or shelves from the slats to store books, art work, toys, or plants etc.
- Privacy and style: Slat wall room dividers are a great way to add privacy and style to your home.
- Cheap: They are also a relatively affordable and easy DIY project.
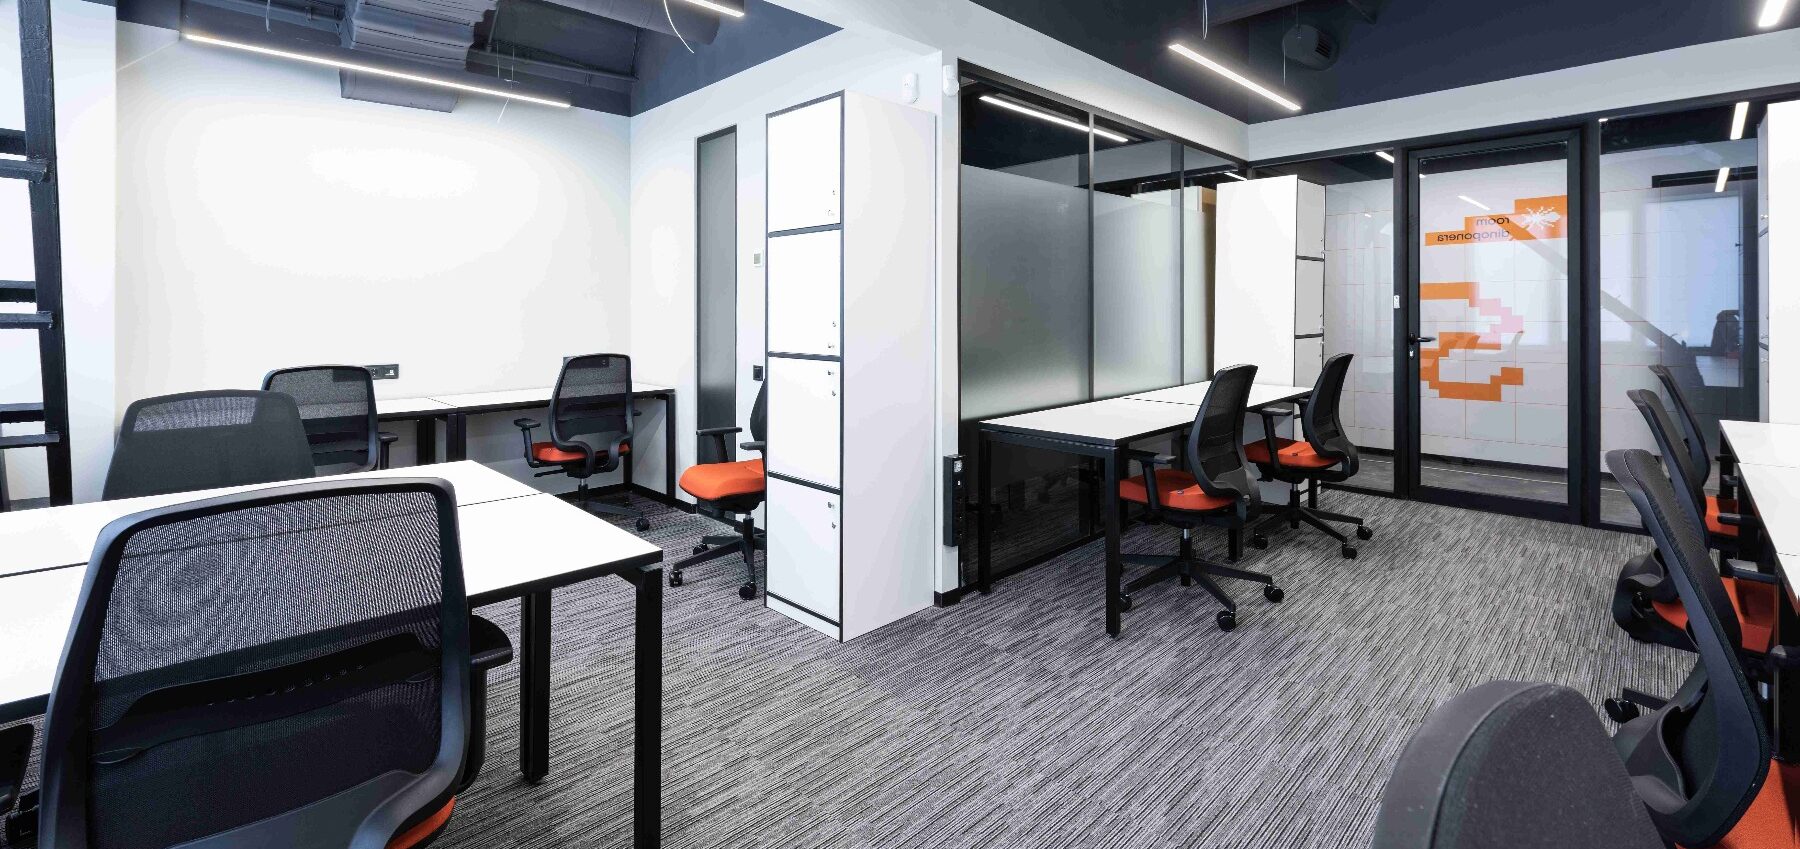
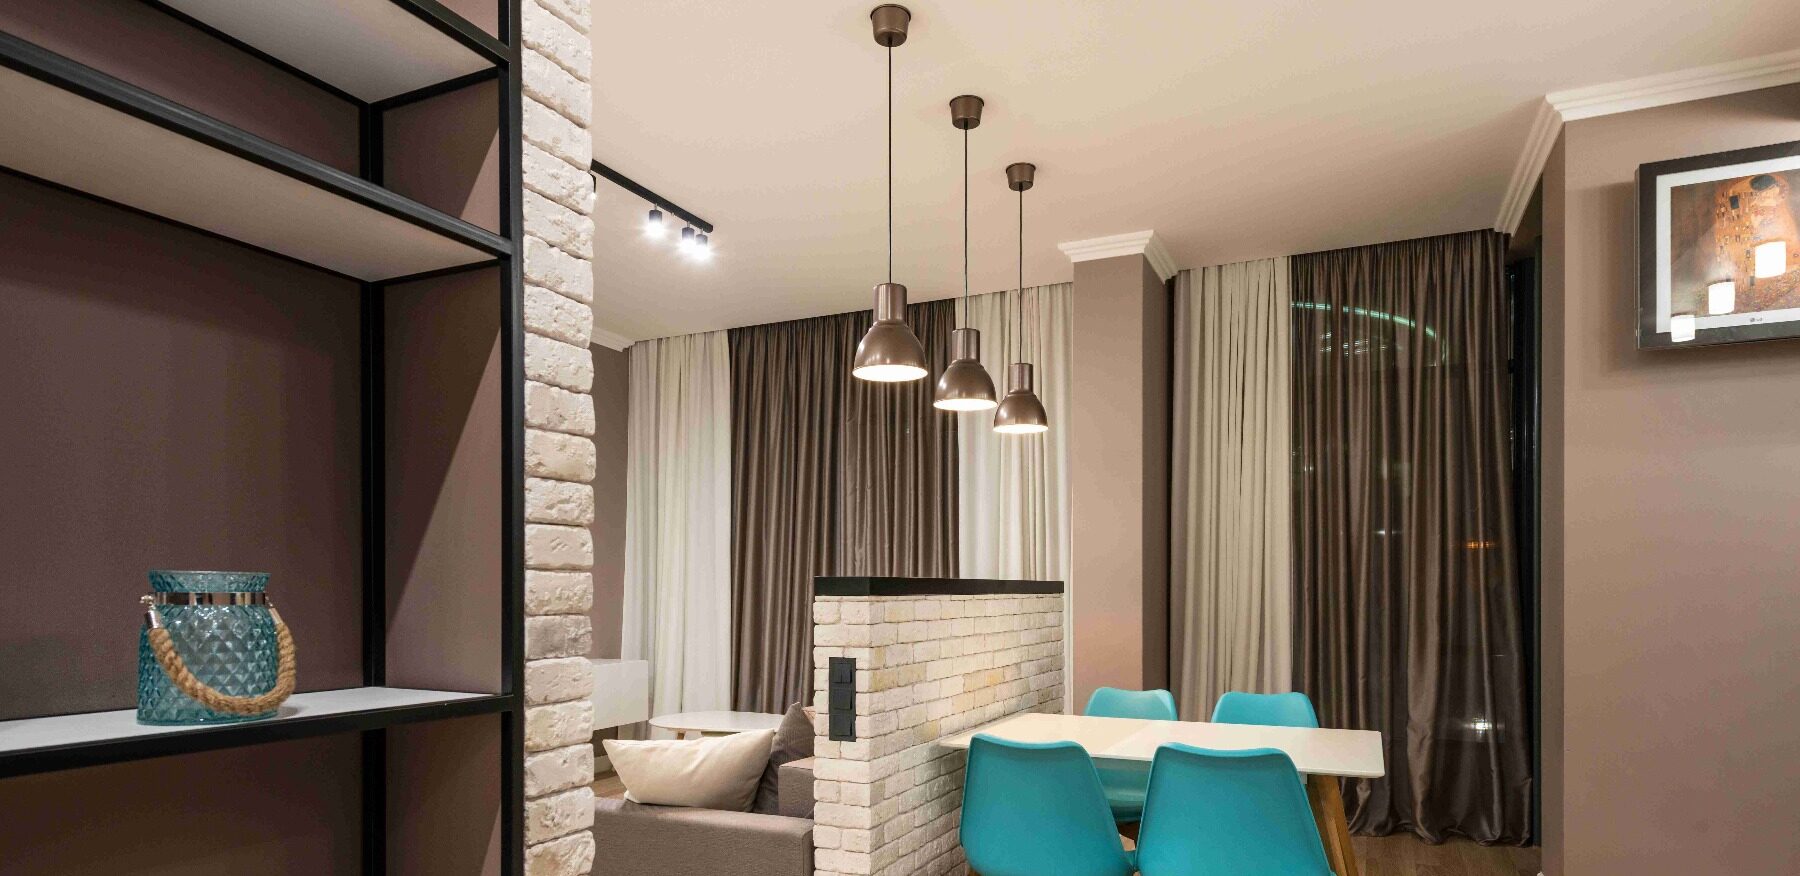
Partition Room Divider Ideas
Partition room dividers are a good option for creating a more permanent space in your home. You can do glass partition, wood partition and metal partition :
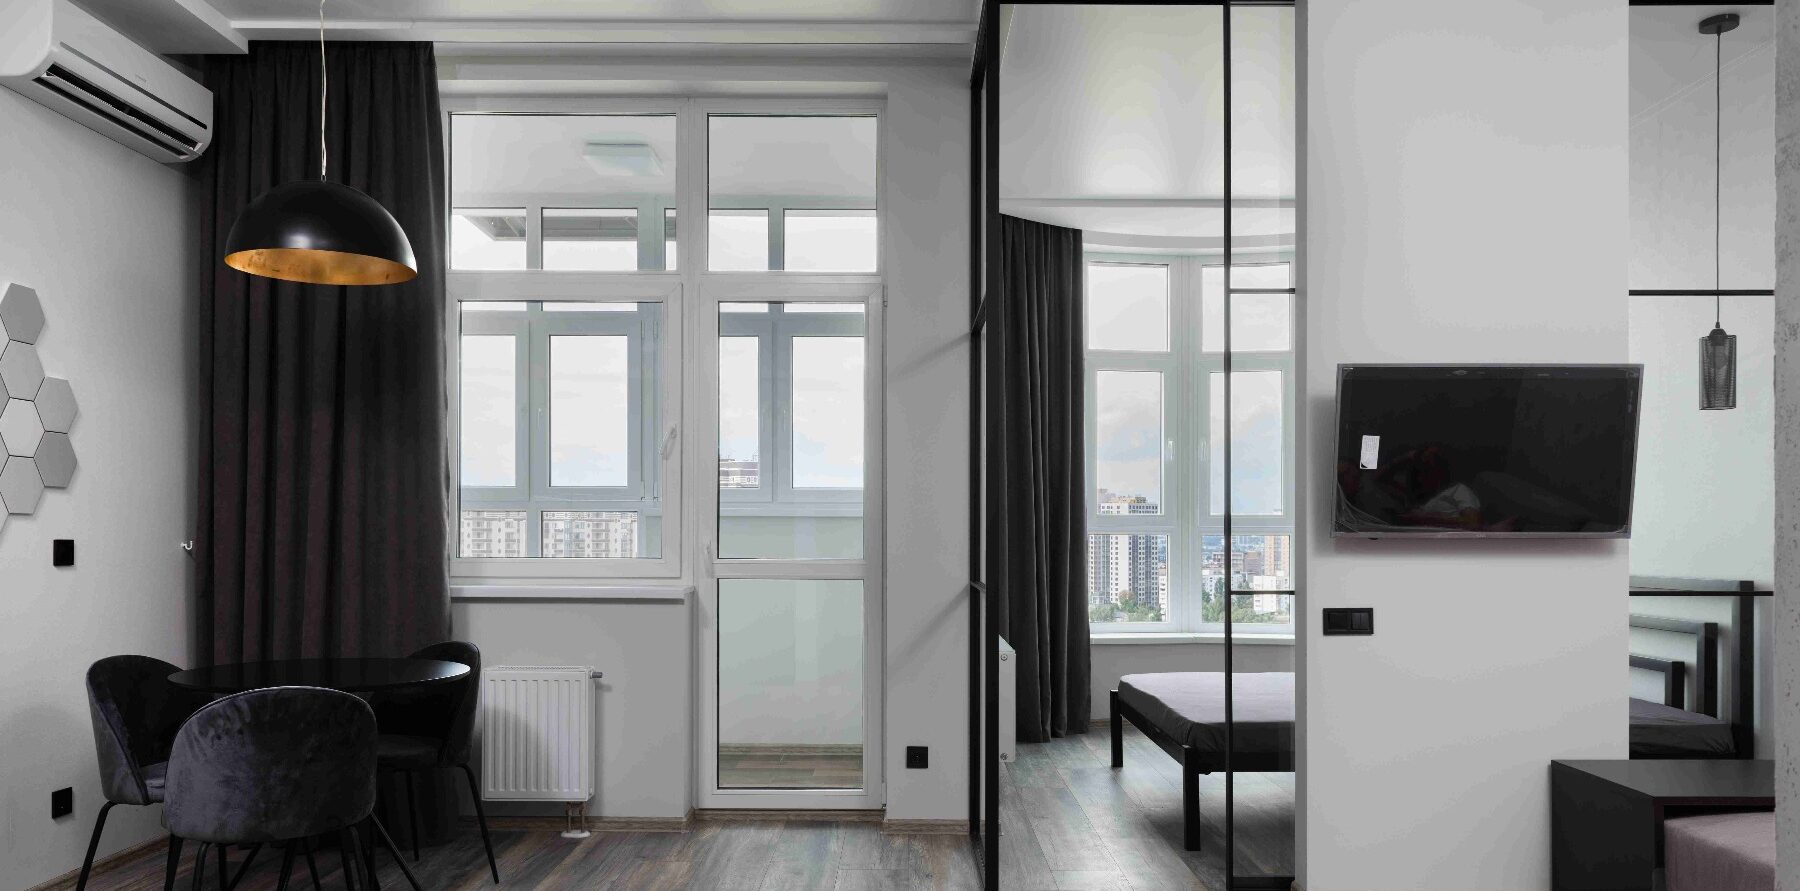
Glass partition
Glass partitions are a great way to divide a room without sacrificing natural light or creating a sense of claustrophobia. They can be used to create separate spaces for work, sleep, or play, or to simply add a touch of style and sophistication to your room decor. One of the best things about glass partitions is that they can be customized to fit any space or budget. There are a variety of different glass types and finishes to choose from, as well as a range of different framing options. You can even find DIY glass partition kits that make it easy to create your own custom divider.
Must follow steps for you:
- Pick the right type of glass. For safety reasons, it’s important to use tempered glass for your partition.
- Measure your space carefully before you start cutting the glass.
- Use a level to ensure that your partition is installed straight.
- Secure the glass to the wall and floor using sturdy brackets.
Benefits of using glass partitions
- They let in natural light. Glass partitions are a great way to divide a room without sacrificing natural light. This can help to make your space feel brighter and more airy.
- They create a sense of openness. Glass partitions can help to create a sense of openness and spaciousness in your home. This is especially beneficial in smaller homes or apartments.
- They are versatile. Glass partitions can be used in a variety of different ways. You can use them to create separate spaces for work, sleep, or play, or to simply add a touch of style and sophistication to your decor.
- They are relatively easy to install. DIY glass partition kits make it easy to install your own glass partition. When you’re not at ease with it, hiring a professional is a wise choice.
Wood partition
Wood partitions are a classic option for room dividers. You can purchase wood partitions from home improvement stores or online retailers, or you can build your own. One of the best things about wood partitions is that they are relatively easy to make yourself, even if you are not a skilled carpenter. There are many DIY room divider ideas available online and in home improvement stores. One popular option is to build a simple frame and then fill it in with wood slats or planks. You can also use reclaimed wood to create a unique and rustic partition.
To install a wood partition in a room, you will need the following materials:
- Wood for the frame and panels
- Screws
- Nails
- Wood glue
- Saw
- Drill
- Level
- Measuring tape
Steps you should follow, are:
- Plan the layout of your partition. Decide where you want to place the partition in the room and how big you want it to be. Mark the location of the partition on the floor with a pencil.
- Cut the wood for the frame and panels. Use a saw to cut the wood to the desired dimensions.
- Assemble the frame. Screw or nail the wood pieces together to form a frame.
- Attach the panels to the frame. Use wood glue and screws or nails to attach the wood panels to the frame.
- Secure the partition to the floor and ceiling. Use screws or nails to secure the partition to the floor and ceiling.
- Finish the partition. You can paint or stain the partition to match the decor of your room.
Types of wood partition
- Slatted wood partition: This is a simple and stylish way to divide a room. To make a slatted wood partition, simply cut slats of wood to the desired height and width. Attach the slats to a frame using nails or screws. You can leave the slats spaced apart or attach them tightly together.
- Latticework wood partition: This type of partition is more decorative than a slatted wood partition. To make a latticework wood partition, you will need to cut pieces of wood into different shapes and sizes. Then, assemble the pieces together to create a lattice pattern. You can attach the latticework to a frame or simply lean it against the wall.
- Reclaimed wood partition: Reclaimed wood partitions are a great way to add character to your room. To make a reclaimed wood partition, simply collect pieces of reclaimed wood. The wood can be in different shapes and sizes. Then, attach the pieces of wood to a frame using nails or screws.
Benefits
- One can utilize them to partition spaces, making room for diverse activities, such as differentiating a living room from a dining space.
- They can be used to create a private space within a larger room, such as a bedroom with a sleeping area and a dressing area.
Precautionary Measures
- Make sure that the wood is dry and free of defects before you start building.
- Use a level to make sure that the frame is level before you attach the panels.
- Use wood glue to help strengthen the joints of the frame and panels.
- Be careful not to overtighten the screws or nails, as this can split the wood.
- If you are installing a heavy partition, you may need to use additional support, such as brackets or braces.
Metal partition
Metal partitions are a modern and stylish way to divide a room. One of the best things about metal partitions is that they can be DIYed relatively easily. There are many ways to make a metal partition, depending on your desired look and budget.
To install a metal partition in a room, you will need the following materials:
- Metal framing studs
- Metal track
- Metal drywall screws
- Level
- Measuring tape
- Saw
- Drill
- Stud finder
- Safety glasses
- Work gloves
The steps involved are:
- Plan the layout of your partition. Decide where you want to place the partition in the room and how large you want it to be. Mark the location of the partition on the floor with a pencil.
- Cut the metal framing studs and track to size. Use a saw to cut the metal framing studs and track to the desired dimensions.
- Attach the track to the floor and ceiling. Use metal drywall screws to attach the track to the floor and ceiling. Double-check that the track is horizontal and firmly in place.
- Install the metal framing studs. Cut the metal framing studs to length and then insert them into the track. Use metal drywall screws to secure the studs to the track.
- Attach the metal drywall to the framing studs. Use metal drywall screws to attach the metal drywall to the framing studs. Make sure that the drywall is flush with the framing studs.
- Finish the partition. You can paint or powder coat the partition to match the decor of your room.
Types of metal partition
- Metal mesh partition: It is made up of a metal mesh that is stretched over a frame. It is a simple and elegant design that can be used to create a sense of separation in a room without blocking out light or airflow.
- Perforated metal partition: It is made up of perforated metal sheets that are attached to a frame. It is a more durable option than a metal mesh partition and can also be used to create more privacy.
- Recycled metal partition: It is made up of recycled metal materials, such as old metal signs or metal roofing panels. It is a sustainable and eco-friendly option that can also add a unique and rustic charm to your room.
Benefits
They are:
- durable
- easy to clean
- ideal for high-traffic areas
- Modifiable to align with a range of room dimensions and stylistic preferences.
No matter what your style or budget, there is a metal partition DIY project that is perfect for you. So get creative and start planning your own DIY metal partition today!
Curtain Room Divider Ideas
Curtain room dividers are an affordable way to divide a room. They can be used to create separate spaces for different activities, such as a work area from a living area, or a sleeping area from a play area. Curtain room dividers can also be used to add privacy to a room, or to simply create a more visually interesting space.
To install a curtain partition in a room, you will need the following materials:
- Curtain rod or tension rod
- Curtain
- Screws or nails (if using a curtain rod)
- Measuring tape
- Level
- Drill (if using a curtain rod)
Steps are:
- Measure the width of the opening before cutting the curtain rod or tension rod to size.
- Choose the location for your curtain partition. Decide where you want to place the partition in the room and how big you want it to be. Mark the location of the partition on the floor with a pencil.
- Measure the width of the opening. Use a measuring tape to measure the width of the opening where you will be hanging the curtain partition.
- Cut the curtain rod or tension rod to size. If you are using a curtain rod, cut it to the desired width using a saw. If you are using a tension rod, extend it to the desired width.
- Install the curtain rod or tension rod. If you are using a curtain rod, screw or nail it to the ceiling or walls at the marked location. Make sure that the rod is level. If you are using a tension rod, simply place it in the opening and adjust the tension until it is secure.
- Hang the curtain. Drape the curtain over the curtain rod or tension rod. Adjust the curtain so that it is evenly spaced on both sides.
Types of Curtain
- Hanging curtain room divider: This type of room divider is made up of a curtain that is hung from a ceiling rod or tension rod. It is a simple and easy-to-make option that can be used to divide a room quickly and easily.
- Framed curtain room divider: This type of room divider is made up of a curtain that is hung from a frame. The frame can be made out of wood, metal, or even PVC pipe. Framed curtain room dividers are more durable than hanging curtain room dividers and can also be used to create more privacy.
- Beaded curtain room divider: This type of room divider is made up of a string of beads that is hung from a ceiling rod or tension rod. It is a decorative option that can add a touch of glamour to a room.
No matter what your style or budget, there is a curtain room divider DIY project that is perfect for you. So get creative and start planning your own DIY curtain room divider today!
Must follow tips:
- Choose the right fabric for your curtain. If you are using the curtain room divider for privacy, select a heavier fabric. If you are using the curtain room divider for decoration, you can pick a lighter fabric.
- Make sure that the curtain is wide enough to cover the entire width of the opening.
- If you are using a tension rod, make sure that it is the correct size for the opening.
- Hang the curtain at the desired height. If you are using the curtain room divider for privacy, hang the curtain so that it reaches the floor. If you are using the curtain room divider for decoration, you can hang the curtain at a shorter height.
Benefits
They are:
- Versatile
- Easy to install
- Can be customized
Conclusion
In conclusion, room dividers offer a world of possibilities for transforming your living space. So, explore the diverse options, embark on some exciting DIY projects, and enhance your home’s privacy, functionality, and aesthetics with these incredible room divider ideas.
Your living space is yours to design, define, and enjoy to the fullest. Get ready to start!


